Build & Deploy React Frontend to S3 + CloudFront
Step 1 – Test and Build the Frontend
cd frontend
npm ci          # clean install from package-lock.json
npm test        # run 11 Vitest unit tests
npm run build   # TypeScript check + Vite production bundle
The dist/ folder now contains all static assets. The verified baseline has:
- 11 frontend tests pass
- Zero known
npm auditproduction vulnerabilities
Preview locally before uploading:
npm run preview -- --host 127.0.0.1
# Open http://127.0.0.1:4173 and check both / (landing) and /app (dashboard)
Step 2 – Configure Frontend Environment
The frontend gets its backend URLs from a .env file at build time. For local
development, copy the example:
Copy-Item .env.example .env
For production deployment, set these environment variables before building:
| Variable | Production value | Purpose |
|---|---|---|
VITE_API_BASE_URL | https://dpeohr327wt9l.cloudfront.net | REST API base |
VITE_WS_URL | wss://dpeohr327wt9l.cloudfront.net/ws/transcribe | WebSocket endpoint |
VITE_WAKE_BACKEND_URL | /api/wake | Lambda wake path |
VITE_BACKEND_HEALTH_URL | /api/health | Readiness polling |
VITE_BACKEND_WAKE_TIMEOUT_SECONDS | 120 | Maximum startup wait |
VITE_MAX_SESSION_SECONDS | 1800 | 30-minute session limit |
Step 3 – Upload to the Private S3 Frontend Bucket
The S3 frontend bucket has:
- Block all public access enabled
- Server-side encryption (AES-256)
- Versioning enabled
- Access through CloudFront Origin Access Control only
Sync the built output to S3:
aws s3 sync dist "s3://livecap-frontend-dev-720459752315" `
  --delete `
  --region ap-southeast-1 `
  --profile <aws-profile>
Warning:
--deleteremoves any S3 object not present indist/. Double- check the destination bucket name before running.
Step 4 – Invalidate the CloudFront Cache
After uploading new assets, create a CloudFront invalidation so edge locations serve the new files immediately:
aws cloudfront create-invalidation `
  --distribution-id E39ADG0ES17RP1 `
  --paths "/*" `
  --profile <aws-profile>
Wait for the invalidation to complete (usually 30–60 seconds):
# Check distribution status
aws cloudfront list-distributions --profile <aws-profile> `
  --query "DistributionList.Items[*].{Id:Id,Domain:DomainName,Status:Status}"
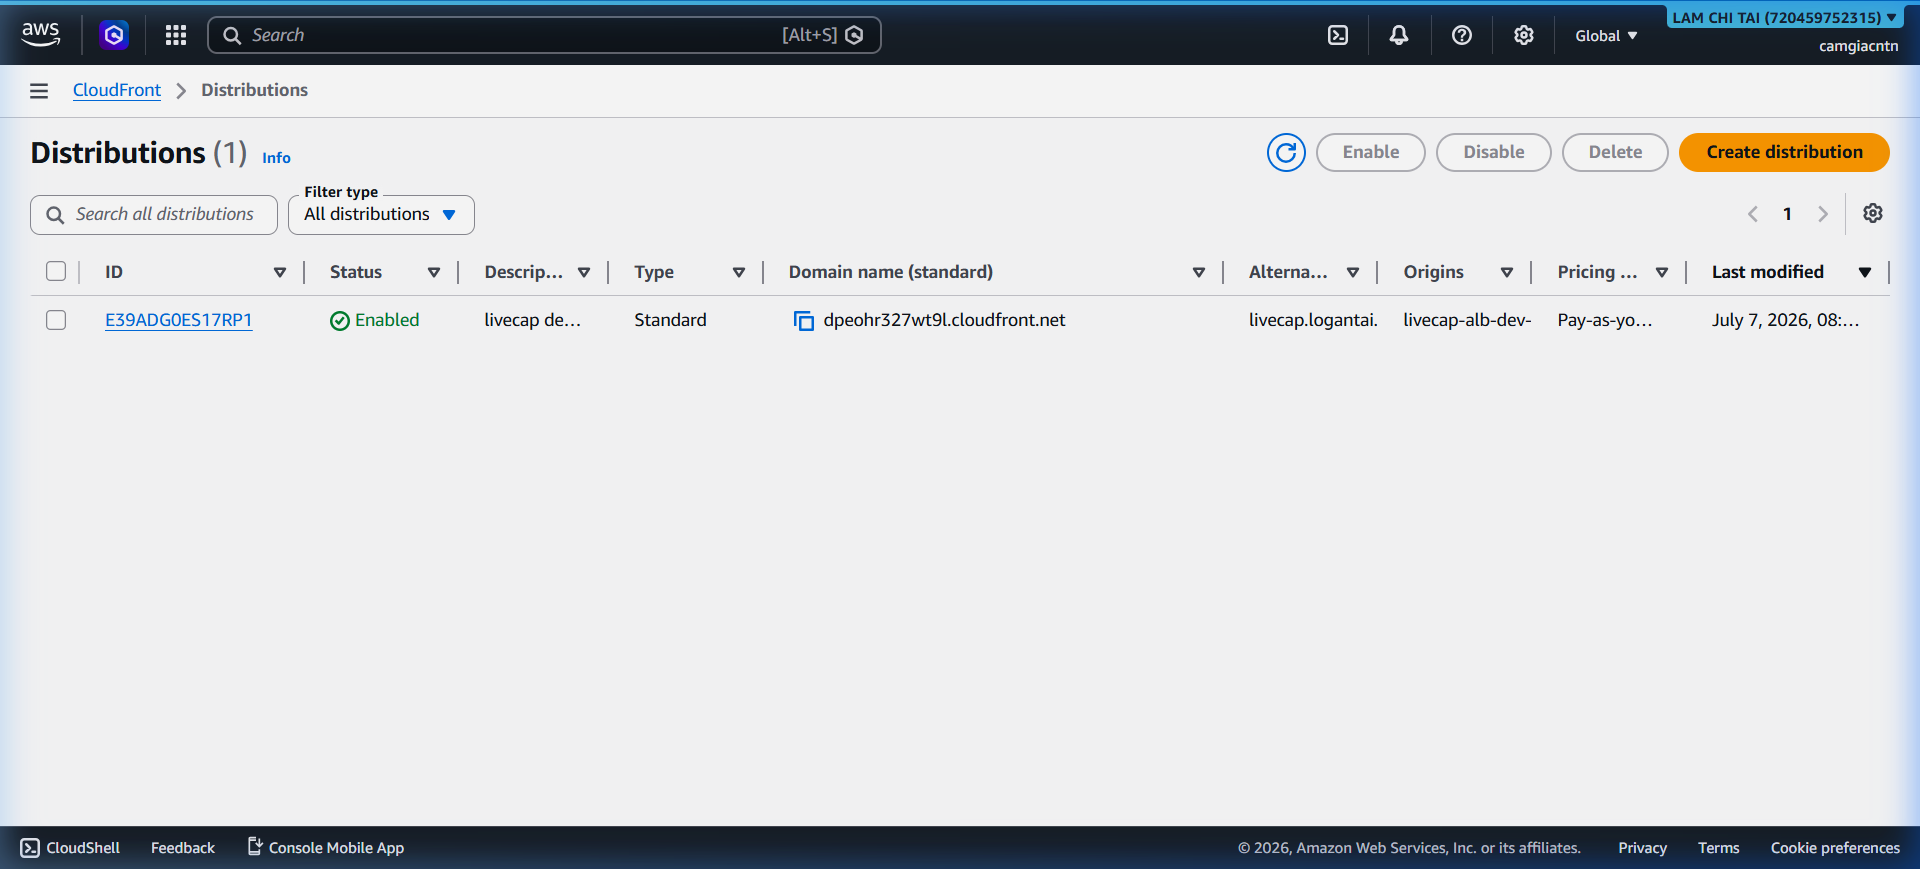
The CloudFront distribution currently serving LiveCap:
Step 5 – CloudFront Path Routing
CloudFront uses behaviors to route different paths to different origins:
| Path pattern | Origin | Notes |
|---|---|---|
/api/* | ALB DNS name | REST endpoints (health, export) |
/ws/* | ALB DNS name | WebSocket upgrade forwarded |
/api/wake | Lambda function URL | Wake-on-demand (target stack) |
/* (default) | Private S3 bucket via OAC | Static React assets |
A CloudFront Function rewrites extensionless React routes (e.g. /app) to
/index.html so that refreshing the page does not return a 403 from S3.
Step 6 – Verify the Landing Page
Open the CloudFront URL in a browser:
https://dpeohr327wt9l.cloudfront.net
The landing page loads with the hero section (“Every voice, in the room.”), an animated bilingual caption card preview, feature highlights and a security section:
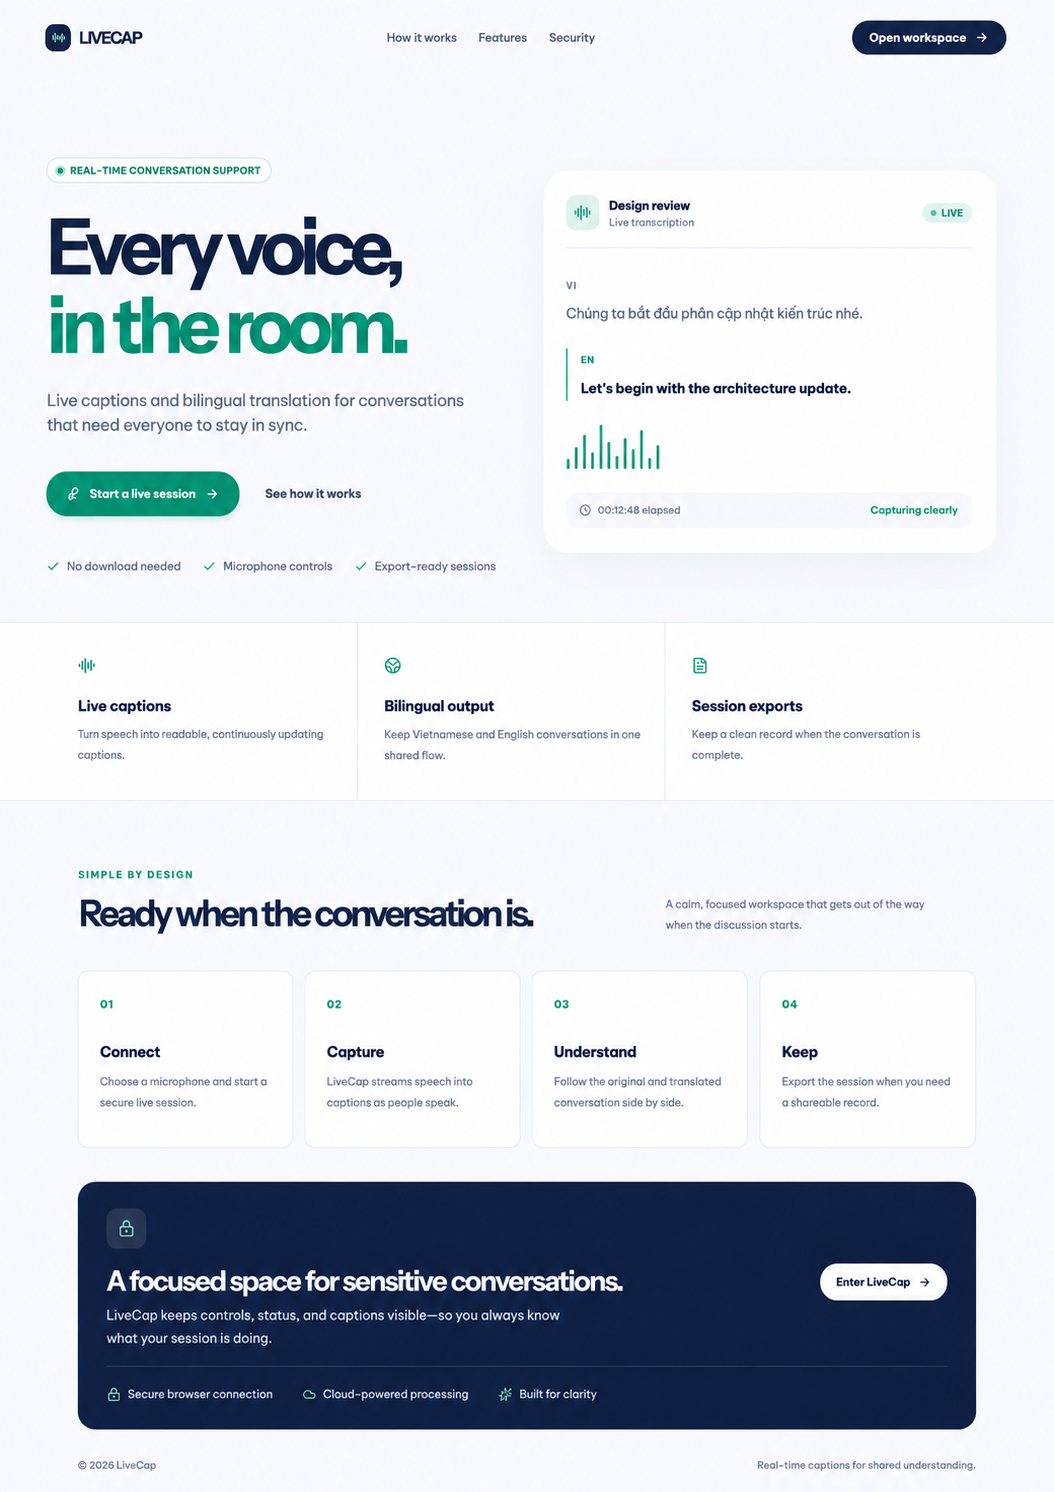
The “Open workspace” button in the top-right and “Start a live session” button
both navigate directly to /app.